
Automating Your Spam Checks
When you rely on email for your business or your clients, monitoring deliverability shouldn't be a manual chore you have to remember to do every week. Located under the Automatic Tests section, the Recurring Spam Checks feature takes the hassle out of checking your email's health by putting the entire process on autopilot.
Instead of manually generating a unique address and sending a test email every time you want to check your reputation, this feature allows you to run tests automatically. By scheduling an email to send on a set cadence (daily, weekly, monthly, or specific days), the system continuously analyzes your spam score, authentication records, email content, and blacklist status in the background.
By configuring automatic alerts, you will be notified of any deliverability drops the moment they occur, ensuring you catch and fix issues on day one instead of discovering them weeks later. Setting up a recurring test is straightforward: it simply requires connecting your email server, defining the email content to monitor, and setting your desired schedule and alert preferences.
Before You Start
- SMTP Credentials: You must have the SMTP connection details for your email server (Host, Port, Security type, Username, and Password).
- Email Content: Have a representative email campaign or template ready to send from your email marketing platform or client to initialize the test.
Step 1: Add or Edit a Sender Account
Before scheduling a test, you must authorize the system to send emails on your behalf by connecting a Sender Account. Each test sends from one account, and you can connect as many senders as you need at no extra cost.
- Login to the Unspam account.
-
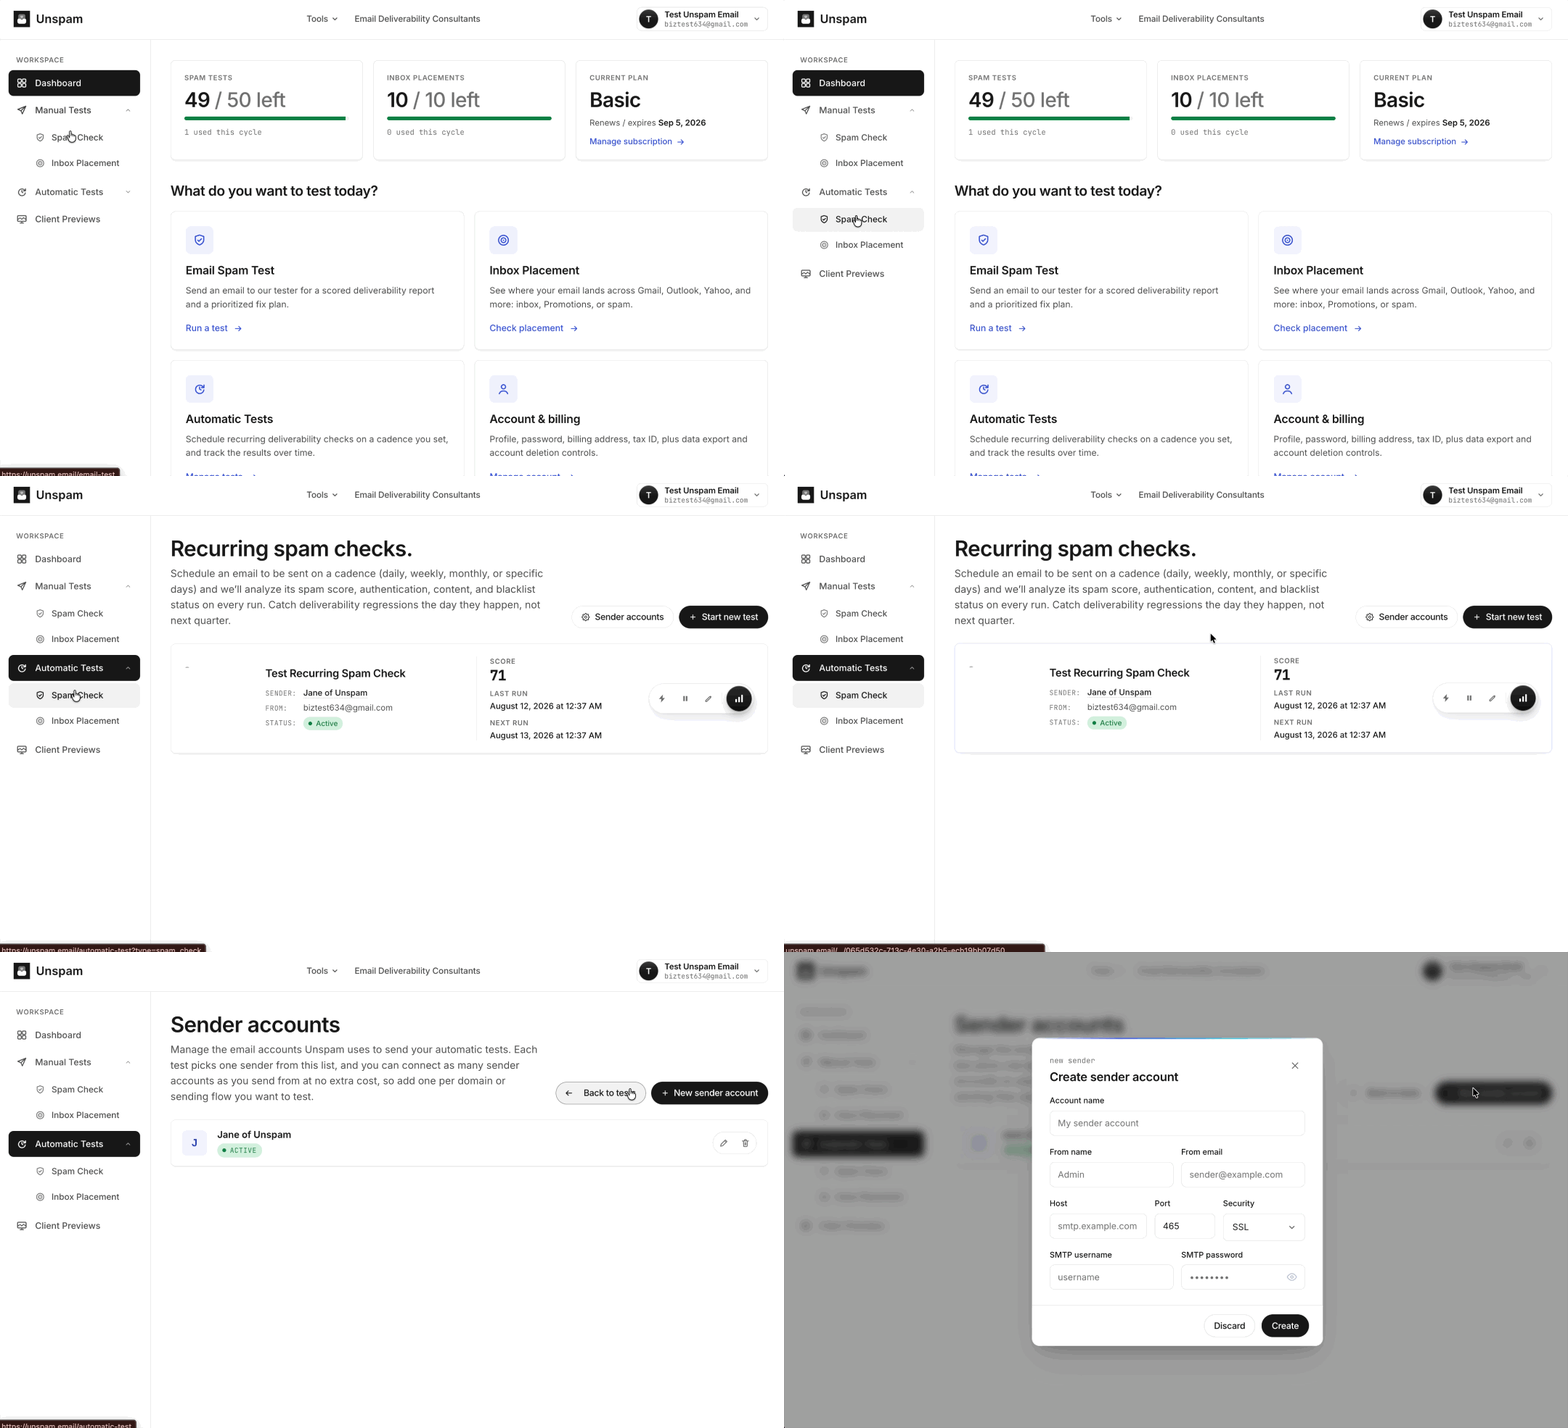
Navigate to the Spam Check page and click on the Sender accounts button.
If you do not have a sender account set up yet, click the New Sender account button. (Note: If you already have accounts listed, you can select an existing one to edit it, or click the button to add an additional sender).
The Create Sender Account form will appear. Fill in your specific SMTP details:
- Account Name: Give this connection a recognizable nickname (e.g., "Marketing Newsletter SMTP").
- From Name: The display name recipients will see (e.g., "Jane at Unspam.email").
- From Email: The authorized sending email address (e.g.,
newsletter@unspam.email). - SMTPHost: The server address provided by your email host (e.g.,
smtp.mailgun.org). - Port: The connection port required by your host, usually
465,587, or25. - Security: Select the encryption type your server requires (
SSL,TLS, orSTARTTLS). - SMTP Username: The login username provided by your SMTP host.
- SMTP Password: The secure password or app-specific password tied to your SMTP username.
- Click on the Create button to save the account configuration.
Step 2: Start a New Automatic Test
Next, you need to provide the system with the exact email content you want to monitor.
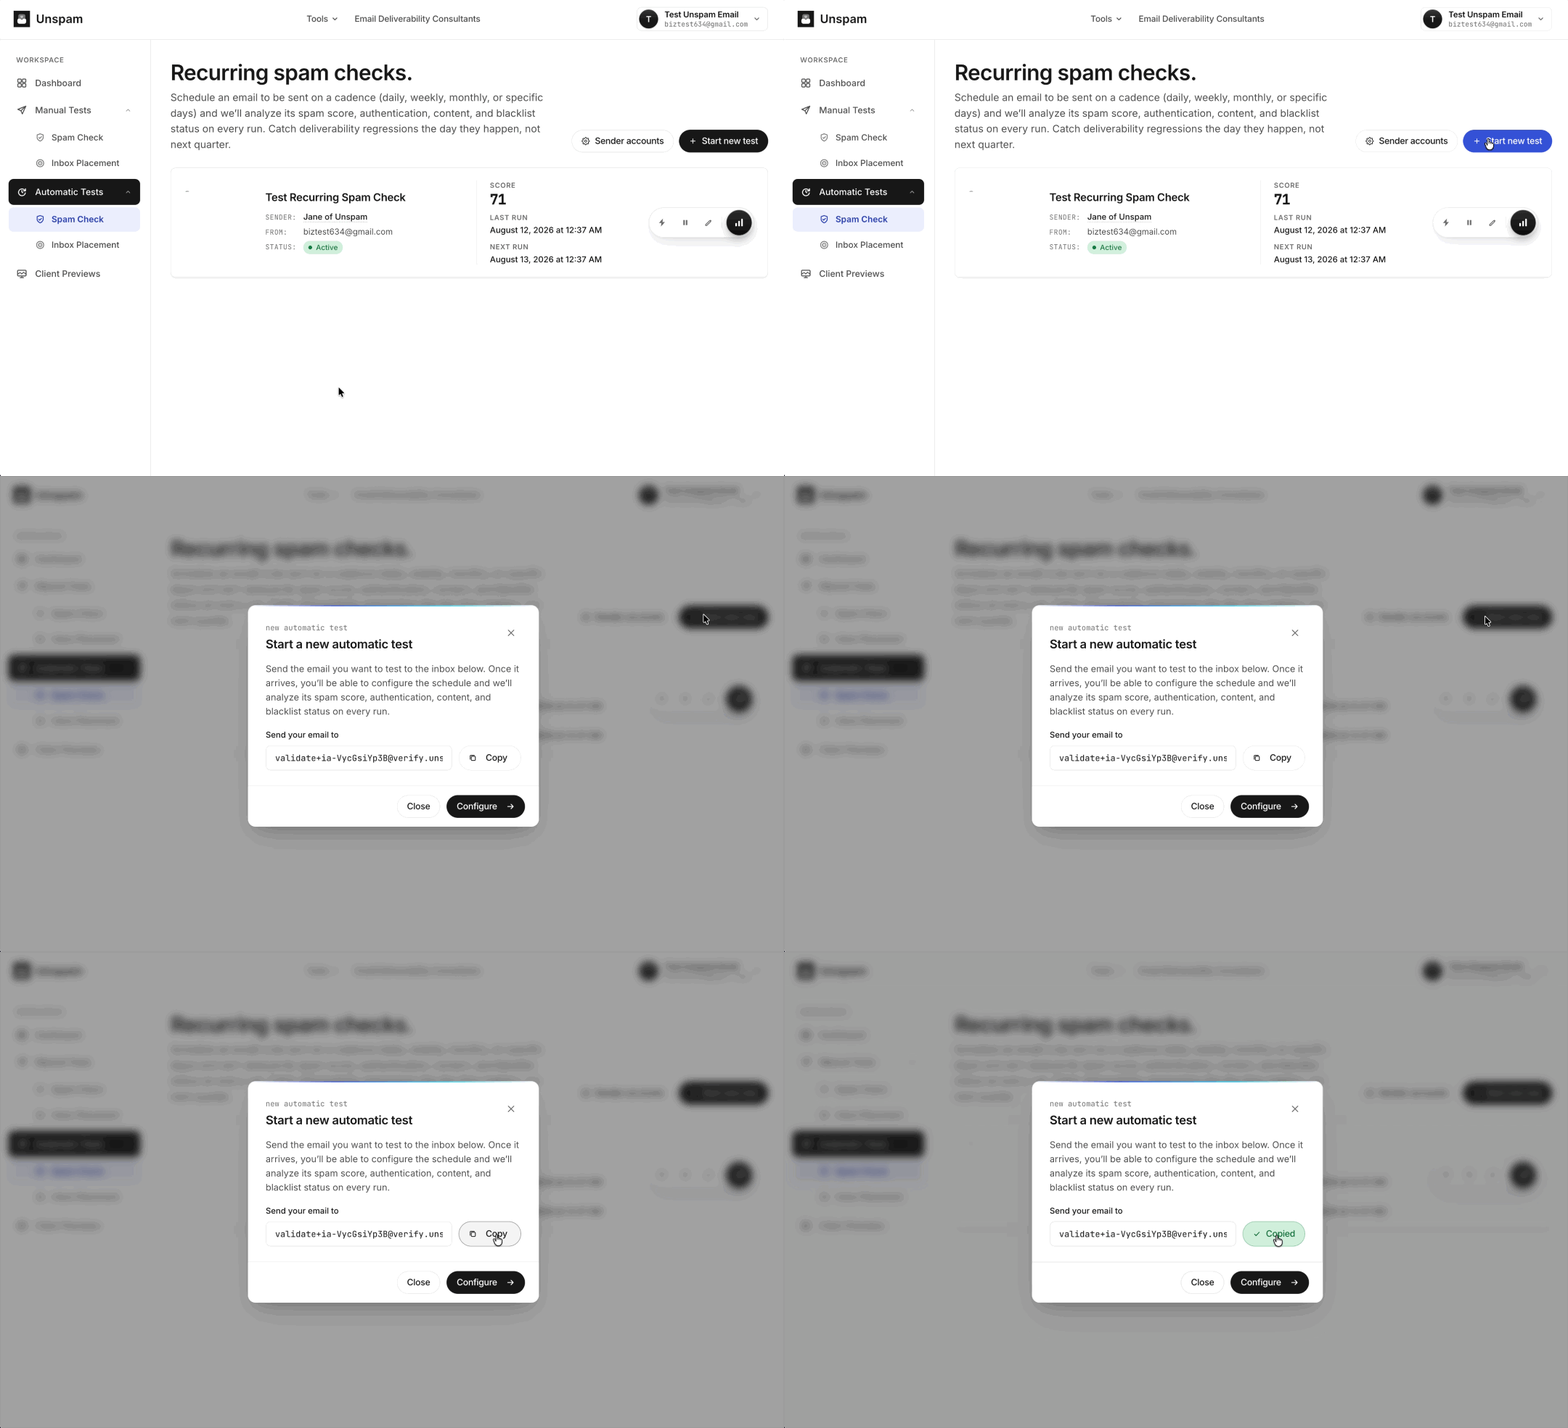
- Navigate to the Spam Check page.
- Click the Start new test button.
- A screen will appear instructing you to send the email you want to test to a unique inbox. Click the Copy button to copy the provided email address to your clipboard.
- Open your email marketing platform (like Mailchimp or Brevo) or your personal email client (like Gmail or Outlook).
- Create your email campaign and paste the unique test address into the "To" or "Recipient" field. Send the email.
- Keep the Unspam page open. The system listens for your email and will update automatically once it arrives.
Step 3: Configure Your Test
Once the system receives your email, you must set the schedule and notification rules.
-
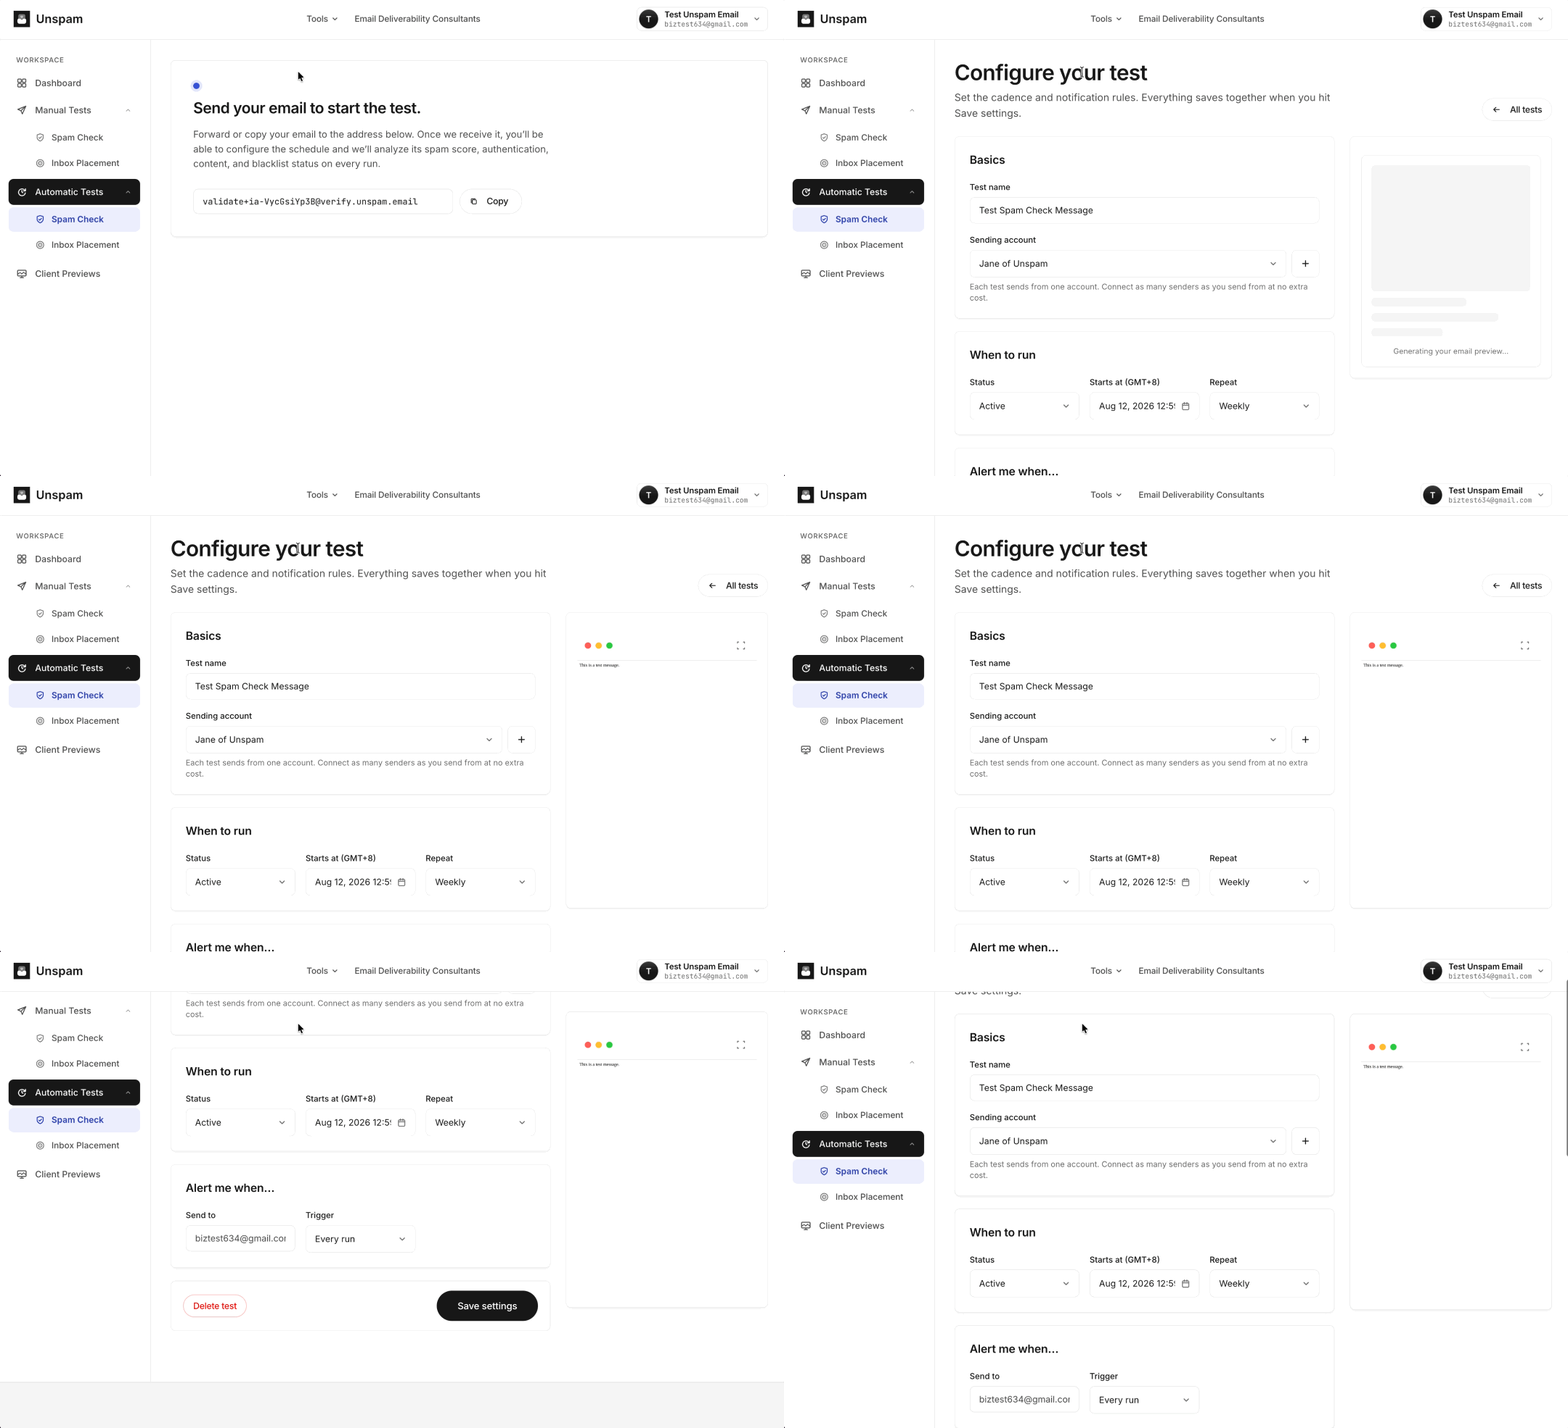
Click the Configure button that appears after your email is received.
The Configure your test page will load. In the Basics section, complete the following fields:
- Test name: Enter a descriptive name for your test.
-
Sending account: Select the sender account you created in Step 1 from the dropdown menu.
In the When to run section, set your cadence:
- Status: Ensure this is set to Active.
- Starts at: Select the time and timezone (e.g., GMT+8) for the first automated run.
-
Repeat: Choose how often the test should run (e.g., Weekly, Daily).
In the Alert me when… section, set your notification preferences:
- Send to: Enter the email address that should receive the deliverability alerts.
- Trigger: Select the condition that triggers an alert (e.g., Every run).
- Click Save settings. Your recurring test is now scheduled.
Step 4: View Reports and Manage Tests
After your first scheduled run completes, you can track your deliverability trends over time.
Viewing the Report
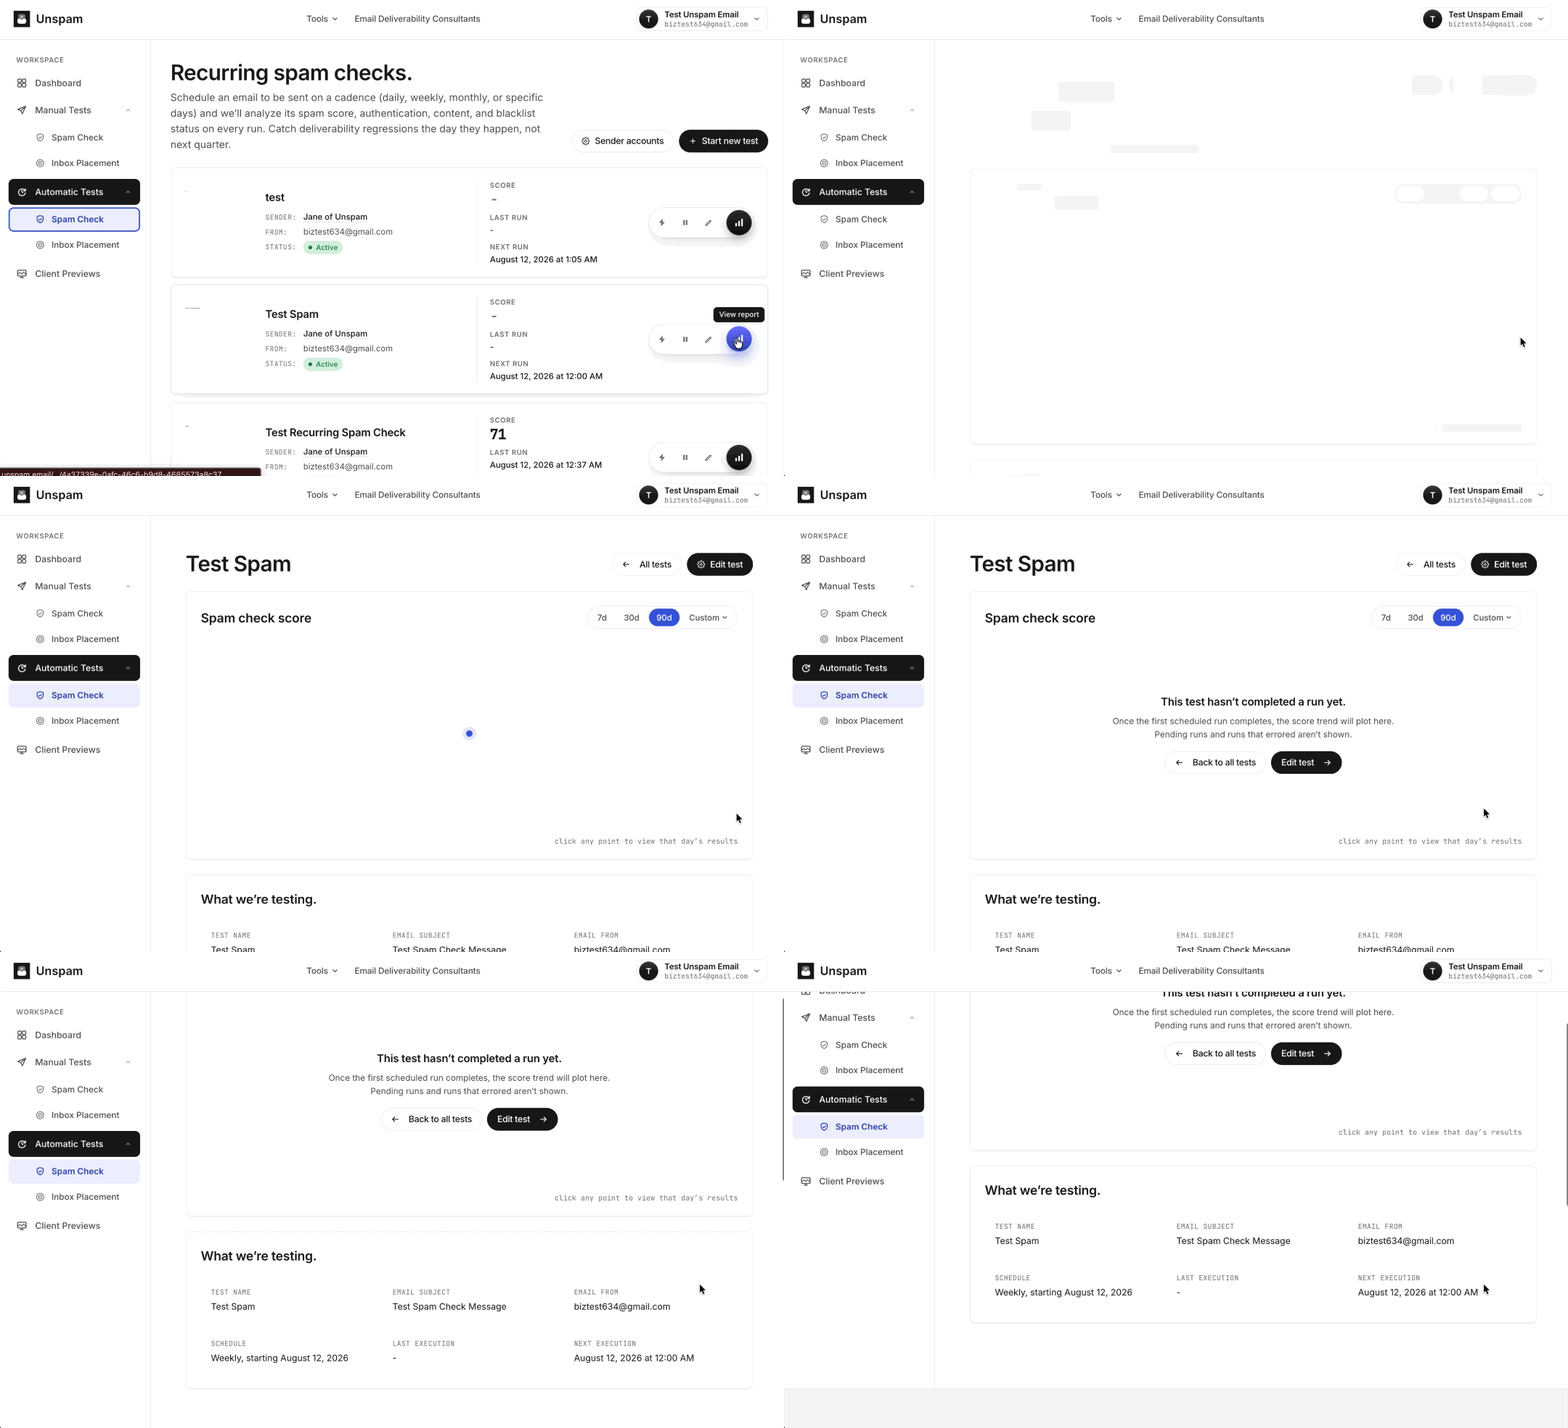
- From your list of tests, click View report.
- You will be taken to the Reports page.
-
The top of the page displays a Spam check score graph. You can filter this trend line by 7d, 30d, 90d, or a Custom date range. (Note: Pending runs and runs that errored are not shown on this graph).
Click any point on the graph to view the detailed spam check results for that specific day.
Below the graph, the What we’re testing panel displays the test configuration summary:
- Test name
- Email subject
- Email from
- Schedule
- Last execution
- Next execution
Managing Existing Tests
From the main All tests list, you can manage your configurations:
- Edit test: Click this to return to the "Configure your test" page to update your schedule, sender, or alert settings.
- Resume this test?: If you previously paused a test, clicking this option will reactivate it. The test will resume running on its schedule, and the next run will fire at the normal scheduled time.